

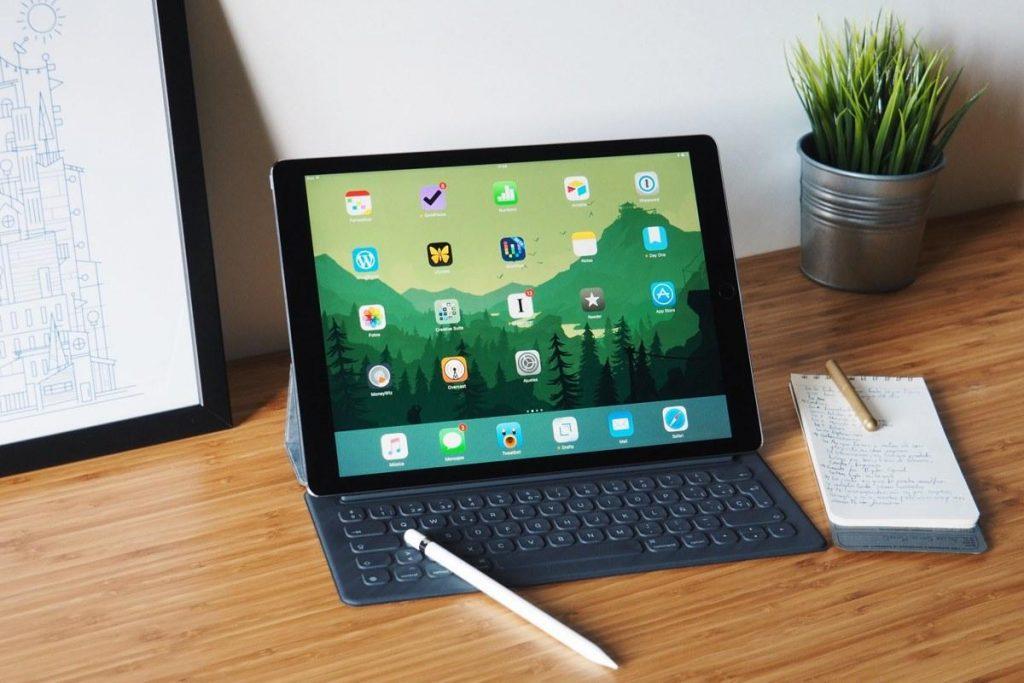
Congrats on your new Apple iPad! This new device is exciting. An iPad enabled with cellular data can do so much. You can go ahead and enjoy everything you love to do with your iPad from any location where there is cellular signal Without being tied to a Wifi service.
The Wifi model gives you incredible capabilities too. You just have to be connected to a Wifi service. The cellular model is slightly more expensive, so it is best for people who are planning to be out of the office quite often or traveling to locations where no internet connection can be easily found. iPads enable users to do so very much including surfing the web, making FaceTime calls, and keeping track of friends. Plus, it provides GPS on a road trip with a huge, high definition screen for ease of use while driving down the highway and spoken instructions if desired.
Popular Applications For New Owners
With access to Apple’s App Store, there are so many options of installable programs that can provide anything from games to health tracking to a variety of capabilities including scanning, faxing, and more. Users can utilize Apple Music for a low monthly fee to have access to the huge selection of music Apple has to offer. 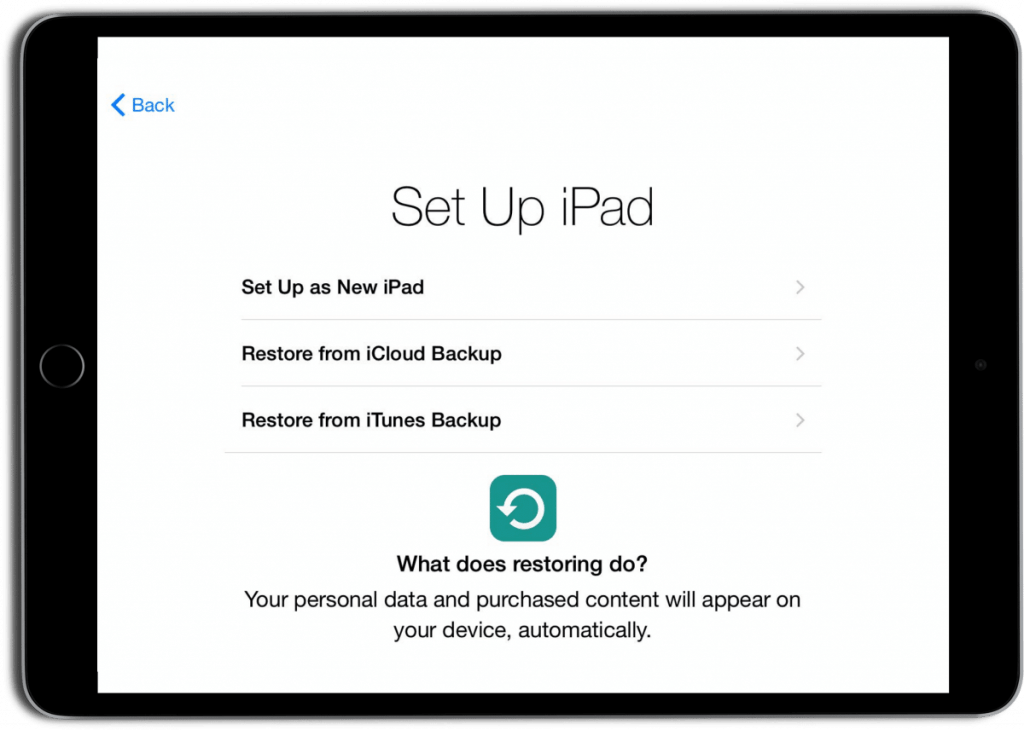 Apple iPad owners can watch movies, television shows, and more all from their iPad on a clear screen with fantastic sound, wherever they are. With its high definition screen, lightweight, convenient size, and ease of use, the iPad is a favorite among tech enthusiasts. It is also a great beginners piece of technology because it is easy to use. Whatever your situation, this was a great choice for years to come.
So You Probably Want to Get Started
The first thing you want to do is get it all set up for use. Once you take it out of the box and peel all of the plastic off. It is a wise decision to place it in a case immediately. Although Apple devices are usually exceedingly hardy, you wouldn’t want to risk any issues. The best way to avoid this from happening is to buy a high-quality case up front. Now, let’s walk through the steps to get that new iPad ready to work with ease. Follow along on your own iPad with the steps below.
Step-By-Step Set-Up Guide
Step 1: Turn on the iPad by pushing the button on the top of the iPad. It is a little thin button that is the color of the iPad’s back so it might be gold, silver, or rose gold. Press down and hold this little button to start. You will see a white screen with the Apple logo right in the middle of it.
Step 2: After a slight wait, it will read “Hello.” Swipe to go to the next screen.
Step 3: A vast list of languages will appear that you can choose from. If you speak English, go ahead and select English from the menu. If not, go ahead and choose the language that you prefer by tapping on it.
Step 4: A list of countries will appear. Choose the country in which you reside before proceeding to the next step.
Step 5: In step 5, you will need a wireless connection to continue the setup process as your iPad now needs to communicate with Apple to get going. If your iPad is cellular-enabled, you will have the choice of either connecting to Wifi or using cellular to continue to set up. If you choose Wifi, you will select from the available networks which differ depending upon where you are and what Wifi you possess. If you are in a coffee shop, bookstore, or other Wifi enabled location, you can use that network as well if you want. You may need to input the password for the Wifi if this is your choice and the network is password protected. Most public places that offer Wifi offer it for free, so you shouldn’t need to pay anything if this is your choice. If you choose to use the cellular network, no password will be required.
Step 6: This step regards location services. Location services help a variety of applications work by bypassing your need to input your zip code or another location marker to use that application. If you would like to turn on location services, meaning the ability to track or use the iPad to find its location, select to “Enable Location Services.” If you would prefer not to use this feature, and you’d prefer to keep it private or input it manually when necessary, select “Disable Location Services” which is in smaller blueprint at the bottom of the screen.
Step 7: You must then decide if you would like to use Touch ID, which is a method of saving your fingerprint to access the iPad instead of a passcode. It can be convenient not to have to input a passcode every time you unlock your iPad. You also have the option of not using this feature. If you want to use it, simply place the finger you would like to use to unlock the iPad in the circular home button. You will need to do this as the screen prompts to ensure that the entire fingerprint is recorded accurately. You also don’t have to use a passcode at all, which we will talk about in the next step. If you’d like to skip this step, you can simply choose “Set Up TouchID Later,” which appears in blue at the top of the screen. You will be prompted to make sure that this is what you want to do if you choose to set up later. Simply select the proper option from the popup box, which will be the place where it says “Continue,” in blue within the popup box.
Step 8: You can then set up a passcode if you prefer. This passcode is a code that will be used to keep your iPad private. You must use this code to get into the iPad every single time. If you want to use one you must, input the code with the numbers available on the screen. You may use a numeric, alphanumeric, or four-digit code. It is always wise to choose numbers that are not easily guessed, so choosing secure arrays of numbers that are not simple is usually the best choice. You can see these options by clicking on the “Passcode Options” in blue at the bottom of the screen. Whatever option you would prefer, click on that option with that menu. You will be asked to input your passcode twice to ensure that no typos were present and both match exactly. If you don’t want to use a passcode, still select “Passcode Options” in blue at the bottom of the screen. At the bottom of the pop-up box, you will see “Don’t Add Passcode.” You will get a pop-up box that wants you to confirm this command, so select “Continue” in blue again.

step 9: Now you will be given a choice of how you want the data of your iPad to be set up. Since this is a new iPad, select the option that says “Set Up New iPad.” This option will give you a clean start since there shouldn’t be a backup you are trying to configure this iPad from as this is your first iPad setup.
Step 10: You can then input your Apple ID and password. If you have other devices, you may have one of these already. If you don’t have one, you can select “Don’t have an Apple ID or forgot it?” in blue beneath the password section. You can take care of this later on with no problems at all.
Step 11: The next screen will give you an option to “Create a Free Apple ID” or in blue it will say “Set Up Later in Settings.” Choose what is appropriate for your situation. If you want to go ahead and set up a new Apple ID, if this is your first Apple device and you don’t have an account, then this is a good choice. If you don’t want to worry about this and you’d like to worry about it at a later time, choose to set it up later. A pop-up box will then ask you to verify this, so select “Don’t Use.”
Step 12: You will be given terms and conditions to read and then agree to. If you agree, select “Agree” from the bottom right-hand corner in blue. You will be given a pop-up box asking again if you agree, simply select “Agree” if you do. Apple likes to make sure its customers understand what they agree to.
Step 13: This is the step to decide if you want to use Apple’s Siri, a virtual assistant who can help accomplish many tasks for you. For example, you can ask Siri to call someone for you, find local restaurants, set reminders, and you can even ask her general questions. Choose to use this feature select the option “Turn On Siri” at the top of the screen with your finger if you want. Or if you don’t want to use this feature, select “Turn On Siri Later” at the bottom of the page. This choice allows you to never turn this feature on or to decide to do so at a later date.
Step 14: You will then be asked about “Diagnostics.” If there is a problem with the iPad and you want data to be sent to Apple about it, select “Send to Apple.” If you don’t want data sent, select “Don’t Send” at the bottom of the page. This choice won’t impact the operation of your iPad, so the choice here is yours if you’d like to give Apple data for improvement or if you’d like to keep your information private.
Congratulations, You’ve Done It
You see the words that welcome you! You’ve done it! You’ve set up your iPad! Congratulations. You thought this was going to be difficult, but you did a great job. You will have the best time with this marvelous piece of technology. It is capable of so much, and it is right in your hands. The set up can seem complicated when looked at all at once, but Apple makes it very straightforward and walks you through the entire process from top to bottom. All you have to do is make one decision at a time and, before you know it, you are all done with the world at your fingertips. As they say, everything is more difficult without practice, so the first time can be more difficult to get through. However, having walked through the setup, you can see that it is simple and very practical. I very much doubt this will be your last iPad as this technology can be rather addicting. If you already have other Apple devices, you know what I mean.
Additional Features
So, now that you have a comfort level with set up, the next time will be a breeze. All you have to do now is get going with all of the great features of your new iPad. Surf the web, install an app, and FaceTime your far away friends and family. Get started planning on that road trip with GPS and the ability to look for traffic jams and construction. You can find the best available restaurant around and message all your friends to meet you there for lunch with the iMessage function which spans all Apple devices. You can pay bills on the multiple banking apps, which I know isn’t fun but it is necessary so why not streamline it.
Online Shopping – You can online shop from either Safari or a store’s own application. Most big stores like Macy’s, Nordstroms, and Best Buy do have their own downloadable application to make the shopping experience easier and more transparent. You can check the weather, view large and easy to see the radar. Order dinner from a variety of apps like Paner’s Rapid Pickup, which is something quite a few of us use all the time.
- Versatility – Whatever your reasons are for deciding upon a new iPad, this was a great decision. It is so versatile and capable of doing so much, there is really no downside. The battery life is fantastic, the signal is usually excellent, and it is hardly even noticeable in weight. It is basically like an extremely thin computer that you can take everywhere.
- Newer Models – The newer iPad Pro models are more capable than many large computers, and this technology is so advanced that there is no need for such bulky computers. These iPads are even larger and have a “pen” included which allow the user to do artwork and other activities with it. The iPad Mini is a tinier iPad, bigger than an iPhone yet smaller than a standard sized iPad, and it has a vast variety of uses too. The regular sized iPad is an excellent middle of the road option in screen size that doesn’t compromise portability while still offering top of the line capabilities that can rival many laptops and desktops out there. There are so many things that can be done with your new iPad, whatever one it is, and it all starts now.